


Step 1:
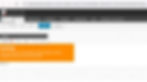
Once you've logged on Sitecore Page, you will see the launchpad. Click on the Content Editor.

Step 2:
Create a rendering
Navigate to the path /sitecore/layout/Renderings/Project
Create a rendering folder
Next,Right click ---> insert, and select Rendering Folder
Name it Learning.
Create a json rendering
Navigate to the Learning folder you created.
Next, Right click --> insert, and select Json Rendering.
Name the rendering Learning as well.
Note : The component is named "Learning," as indicated in the Component Name field.

Step 3:
Add rendering to Placeholder Settings
Note : We'll include our newly created "Learning" component in the list of renderings that the Main placeholder is permitted to have.
Navigate to the path - /sitecore/layout/Placeholder Settings/Project/Learning/Main
Note: Please be aware that you need to click on the "Main" item in Sitecore. This is because, although the item is named "Main," its Display Name remains "Main."

Under Allowed Controls click on the edit.
Navigate to the Learning component, and double click to select (alternatively, click the right arrow next to Selected)


Make sure Learning is on the right side under Selected.
Click on the OK.
You will see that Learning is now in the Allowed Controls field.
Click on the Save to save the Main Placeholder Setting item.
Step 4:
Add rendering to a page
Navigate to the path - /sitecore/content/Learning/www/Home

Click on the Publish > Experience Editor. The Experience Editor is where we can preview and edit how our page looks.

I can't find the component in the experience so we need to add it in available renderings.
Add the rendering item by navigating to /sitecore/content/Learning/www/Presentation/Available Renderings/Navigation.
Save the item and go to the experience editor.


I've integrated it into the Experience Editor, and it automatically generates a localhost in connected mode.


Step 5:
Create the Next.js component - Visual Studio
Open Visual Studio Code
Next Created folder src\components\Feature
Create File Name is Learning.tsx.
Note : You have create to component in your Next.js application, you'll observe the changes in both the Experience Editor and the Next.js app if it's in connected mode.


Arul Pushpam, Sitecore Developer,
A dedicated Sitecore developer with a passion for staying ahead in the ever-evolving world of technology. With a keen eye for innovation and a commitment to excellence, I specialize in crafting exceptional digital experiences using the latest Sitecore advancements.